In this article
Sweet mother of any deity, this map is insane. 26 armies against just you... Wow, just wow.
Story
Mons Graupius, 84 AD. The united tribes of Caledonia abandon guerrilla warfare and decide to confront the Romans in the open at Mons Graupius. Build a settlement at Normandykes from which the troops of Agricola will depart. A victory is all that separates them from reaching the limits of Britannia.
Objectives
- Train 50 guards
- Free the city of Dun
- Free the city of Taixalon Akron
- Free the city of Cawdor
In short
- Difficulty: Hard
- Region map: Big
- Trading routes: 17
- Initial resources:
- 10.000 Denarii
- 650 wood
- 650 stone
- Enemy presence: 26 armies
- Fighting required: Yes (you'll have to defeat all of them)
Walkthrough
As with the last mission, fertile ground is scarce on this map. The single patch of fertile ground is clear though, so at least that does not pose a challenge.
There is enough water and open space to build a pretty city, so you don't have to worry about running out of anything while preparing for this military onslaught that is bound to happen.
You only have 650 wood and 650 stone as starting resources, which isn't a whole lot. You will need to be really careful with your build order!
Because let's face it: you will be challenged by the Caledonians. 2 armies of enemy soldiers are visible from the start. This puts your raid risk at a hefty 60%. Those armies are quite decently sized as well at 60 archers for the closest one and a 49 infantry + 42 archers for the second one.
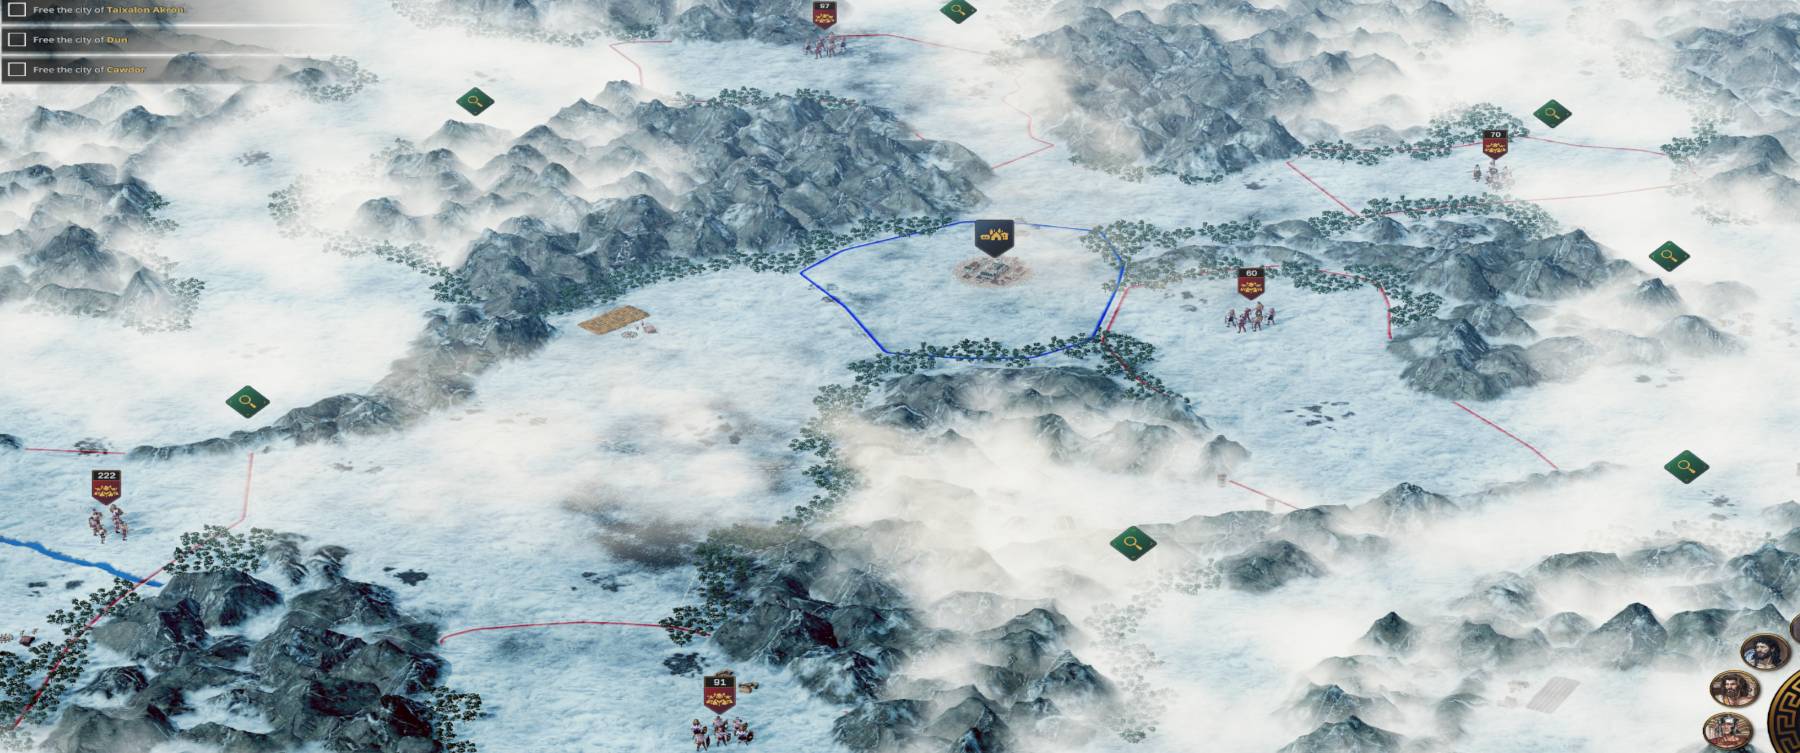
At the start of the game, 5 armies surround your city.
As with the previous map, the lack of starting resources means you should take it relatively slow. Start by building a market, 4 Plebeian housing and a reservoir. Protect them with a fire station and engineers' post. Start a basic supply chain with a logging camp and a stone quarry and a wheat farm. For now, that's it.
This should leave you with about 5000 - 6000 Denarii and just under 200 wood and stone. The good thing is: those resources are going to increase. The money is going to go down, but you can deal with that later.
Tip: build your housing in a 'circle' of 3 by 3: 8 houses with a hole in the center. In the middle you can later place decorations, which will increase the desirability and allow for housing level upgrades.
Your goal is to set up a decent economy, so that your citizens can fend for themselves. For a more detailed explanation of how to progress, follow the walkthrough of the previous mission.
Protecting the city
One of the objectives is to train 50 guards. While I'm usually of the 'do not worry about raids' kind of guy, in this case I'll yield. First of all because it's an objective to train guards. Second because there are so many enemies that the raids are going to be incredibly annoying.
As you are going to be protecting the city, you will need towers and walls. They cost a lot of Stone Bricks and Wooden Planks, so build another couple of Stonecutters and Sawmills to be able to provide for those.
To train guards, you need Wheat, Pork steaks, a Sword and a Bow. Make sure you are producing enough of these goods. Build a Recruitment barracks and Guard training building and start cranking out Guards.
Tip: pressing shift while clicking the train Guard-button will add 10 Guards to the queue instead of just 1!
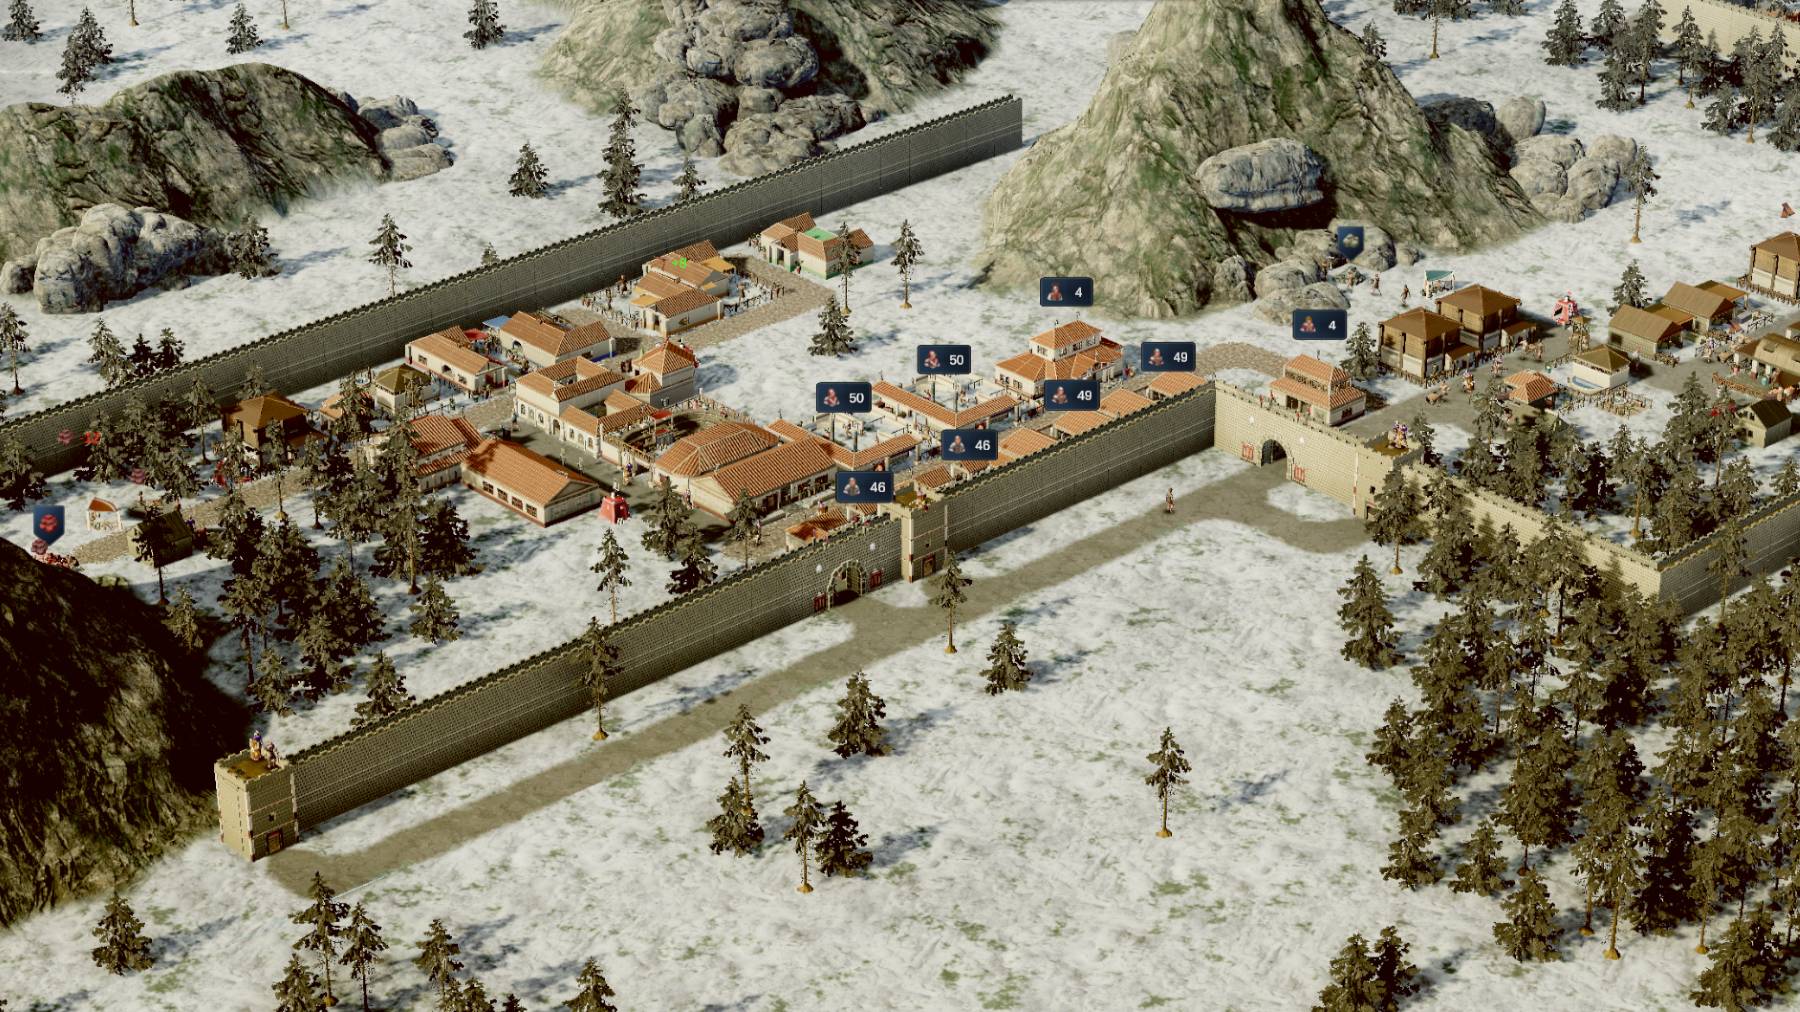
An industrial section of the city, protected by walls, watchtowers and guard houses.
While you are training the guards, you can start building defensive buildings. Walls are great to keep raiders out, but can be broken down during the attack. Build Watchtowers at regular intervals along the wall, keeping an eye on their service area. Make sure they overlap, so that enemies can't slip through the cracks. Also make sure both walls and watchtowers are covered by engineers posts to avoid them collapsing!
Build Guard posts throughout your city and other areas you don't want to invest in walls. Walls and Watchtowers obviously provide the best defense. But 3 Guard posts will do just fine as well. Guards are tough!
Tip: Add the second guard to all the Guard posts and Watchtowers you build. With 50 guards trained, you can build 25 of these buildings. They only take 2 Guards per building.
Once you have your 50 guards trained ✅ and have built your Guard posts and Watchtowers to protect the city, start training an army. You're going to need all the manpower you can muster!
Exploring the map
By now, your city should be in great shape, money is rolling in and army training is going swimmingly. Time to conquer Britannia!
Start with the army of 60 archers to the east of your city. From there, you can go down to the west to find a relic (dedicate it to Mars!) and a friendly legion of 20 infantry.
Then send an explorer East. The area splits to the south-west and north-east. In the south-west you will find an army of 88 (mainly Cavalry). The other way, keep going east to run into an army of 79 (mainly Archers). Keep heading (north) east and you will find Menteith and a group of 40 Archers to join you.
From Menteith, follow the coastline south to find Devana. This city is of little consequence, but it does open up 2 paths to explore further down south. On the left path you will find a relic deliverable to Pluto or Jupiter, if you happen to need either of those. Continue West to find Normandykes.
On the right path however, continue south until you discover an army of 103 (mainly Cavalry). Defeat it to free Raedykes, unfortunately not one of your objectives. Again, the city isn't too exciting, but it does open the path further down the coast.
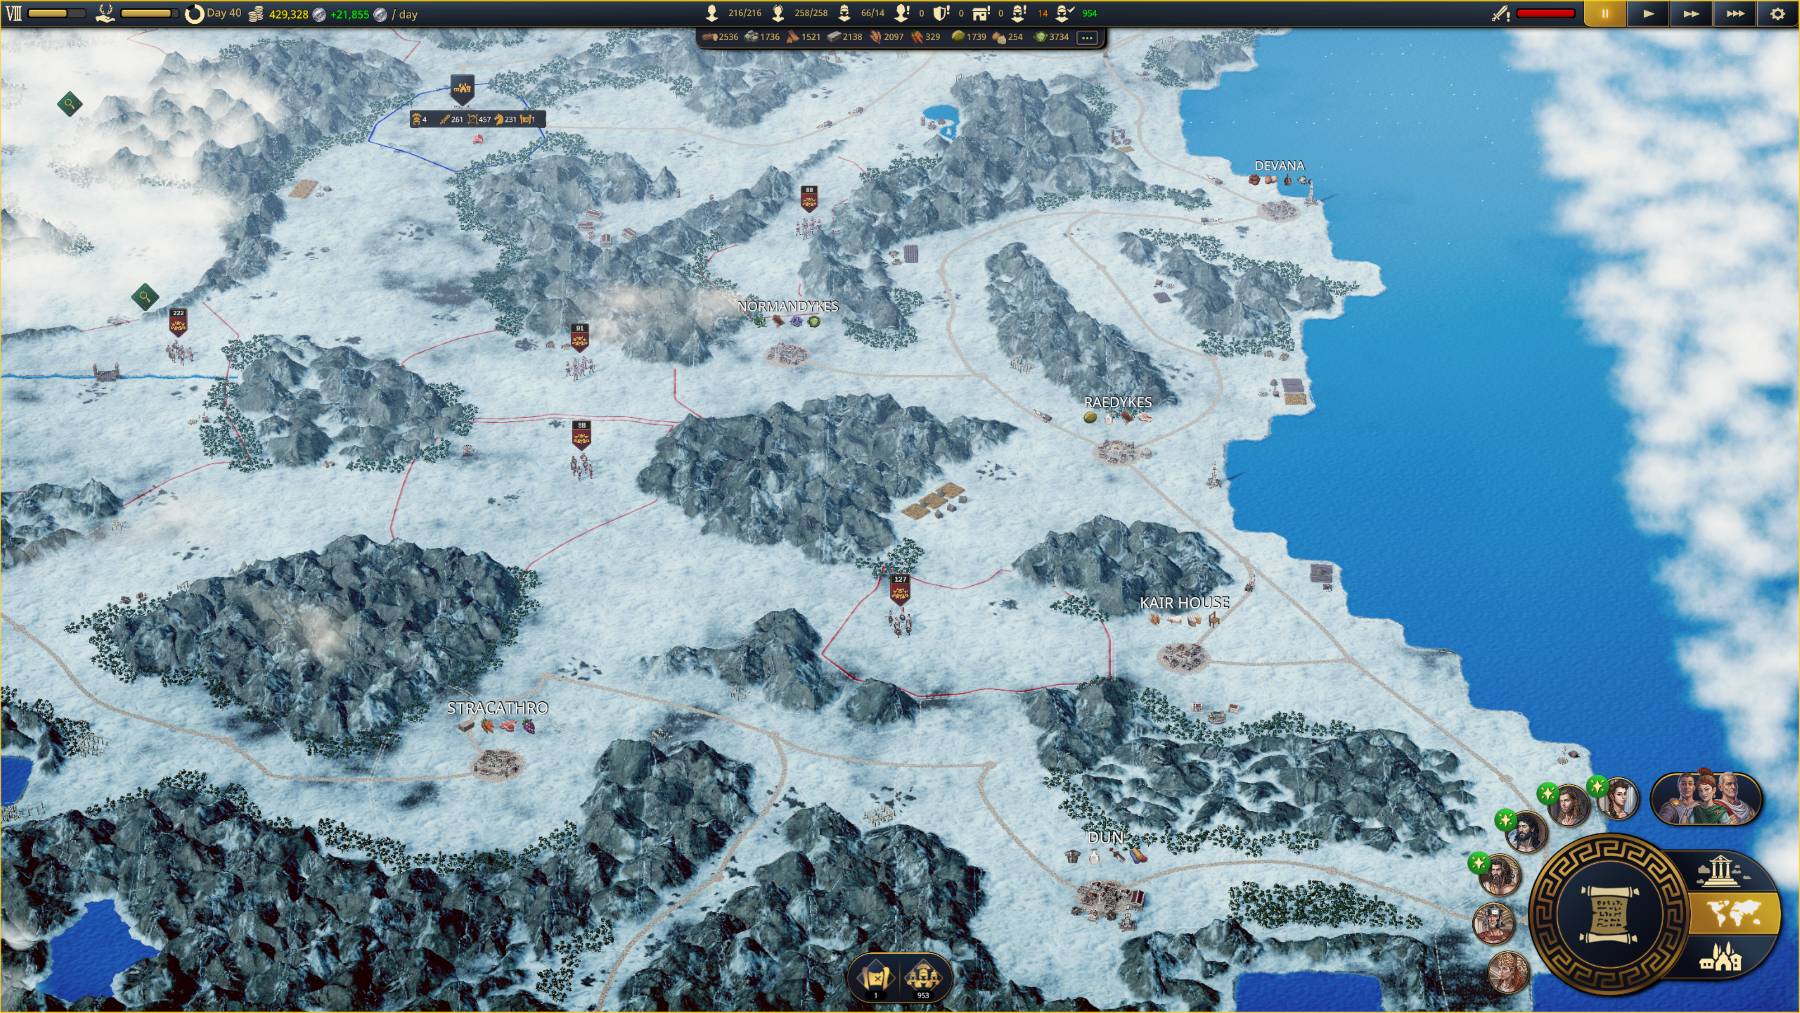
The bottom left portion of the map, with Dun in the south east corner.
First, you'll run into an army of 172, mainly Cavalry. Those Caledonians do know how to breed horses. Once you have reached the end of the road (with another relic for Mars), track back a little and head west. You will meet an army of 151 (again, mainly Cavalry) holding a city hostage. And here you will finally find the first city that needs freeing: Dun! ✅
From Dun, continue west to find another relic for Mars. The road splits west and south. You can go south and follow the mountain pass. Defeat the army blocking the pass. Your reward will be discovering the city of Marcus and a friendly army of 50 Cavalry to join you. It's up to you if you think that's worth it.
Following the road to the west, you will discover Stracathro. Cling to the mountain range in the south while going west to find a relic for Mars in the region with the lake. Head around the lake and then west to run into an army of 207, with a whopping 138 cavalry. The good news? You can walk around them.
To do so, go west, around the rectangle lake and track south. There are 2 relics for Mars you can find here: both around the mountain range to the south. Go south then east to find the first one. Travel around that mountain range counter clockwise to discover another relic in the lake to the south of the mountains.
Continue west, travel around the army of 120 to the north to discover Dunadd. They will aid you with 50 Infrantry, which are always welcome. To the far west is a Golden Apple, a relic you can deliver to... Mars!
More fighting
North of Dunadd is a city protected by an army of 174. It is mainly infantry with 2 Centurions, so you'll need some strategy to grab a victory here, but you can handle it.
Due to the layout of the battlefield, you can make a stand at your position. Protect your archers with infantry, use cavalry to harass the enemy and let your archers rain down hell on the field.
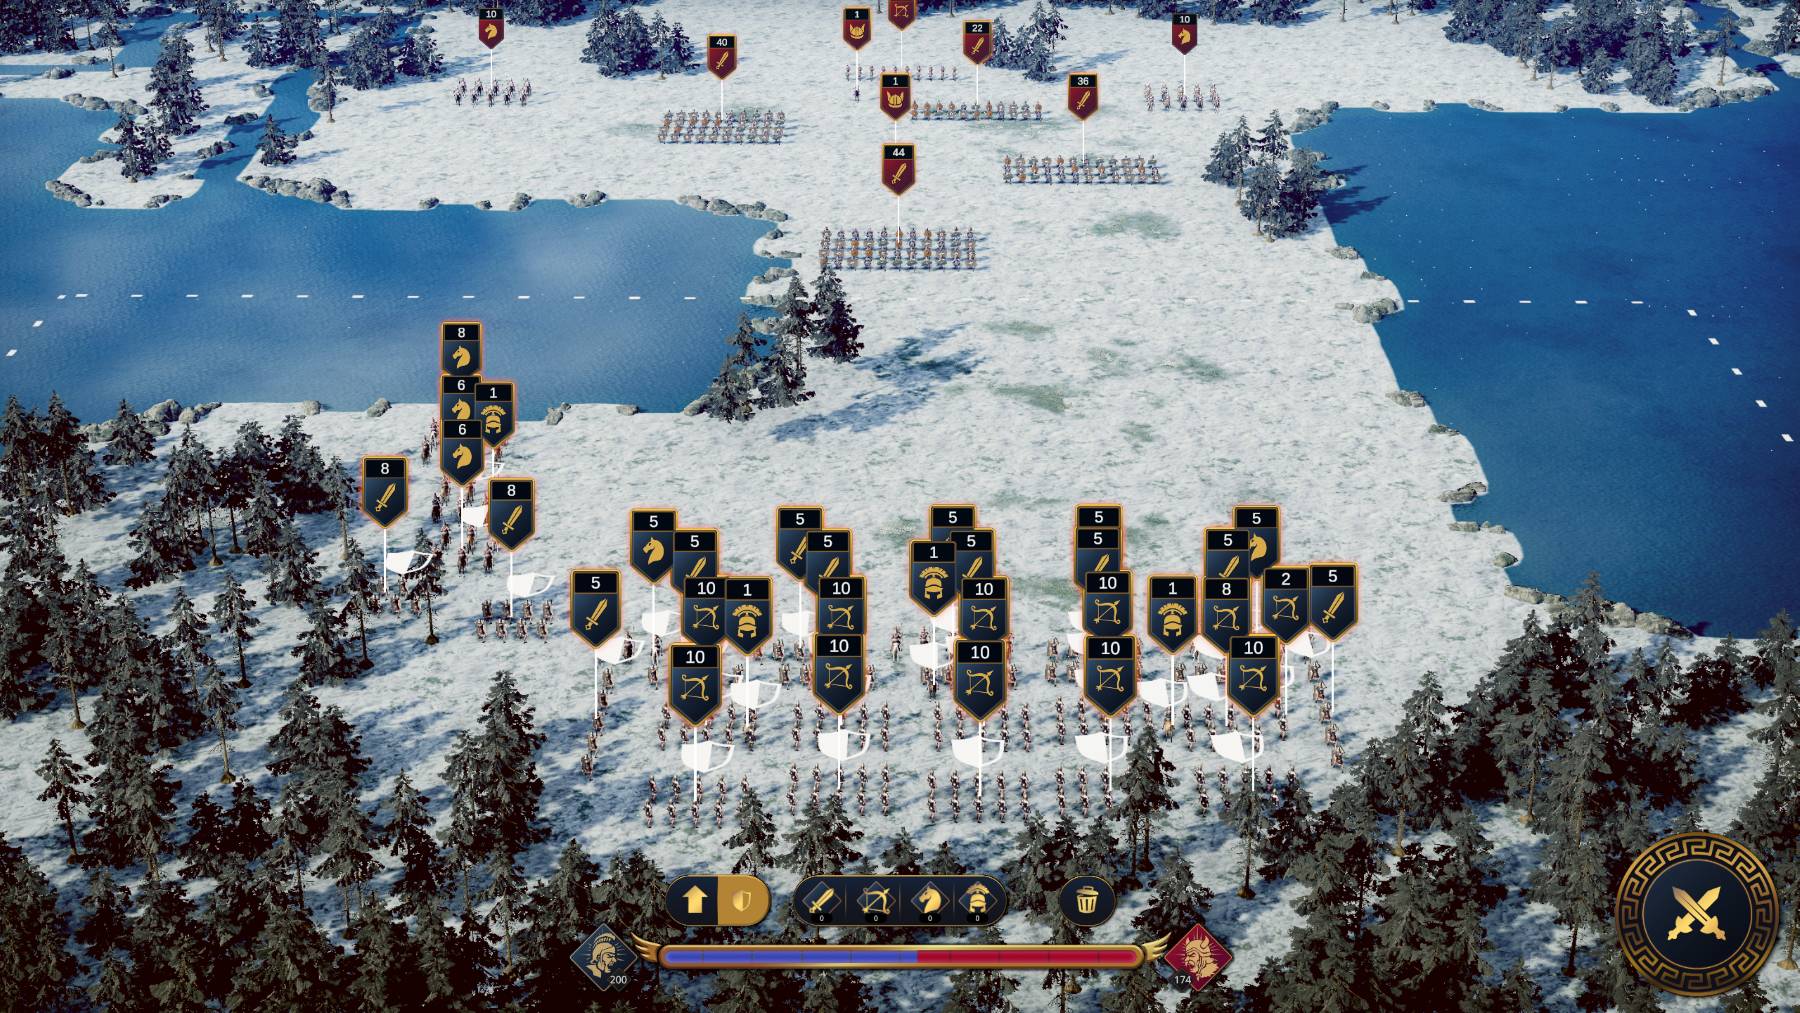
A battle formation at the start of one of the battles in Citadelum. Soldiers are set to hold their ground, awaiting the enemy.
Once you've defeated this army, another objective has been completed: you have freed the city of Cawdor! ✅
North > West of Cawdor is another relic for Mars. If you follow the road along the coast, you will find another relic for Mars in one of the mountain passes and at the far end: Coille Falaich. The city is boring, only selling and buying basic goods. But they do supply a small legion of 25 archers and 25 cavalry, so it's worth sending a scout up for.
Wrapping up
With 3 out of 4 objectives completed, it is time to finish the last one. And this is going to be tricky.
Taixalon Akron is not that far away from your home town. To get there, follow this path:
North > North East > North > North > North East* > East > North
*You could go East instead, but there's an 140 strong enemy army there with mainly archers.
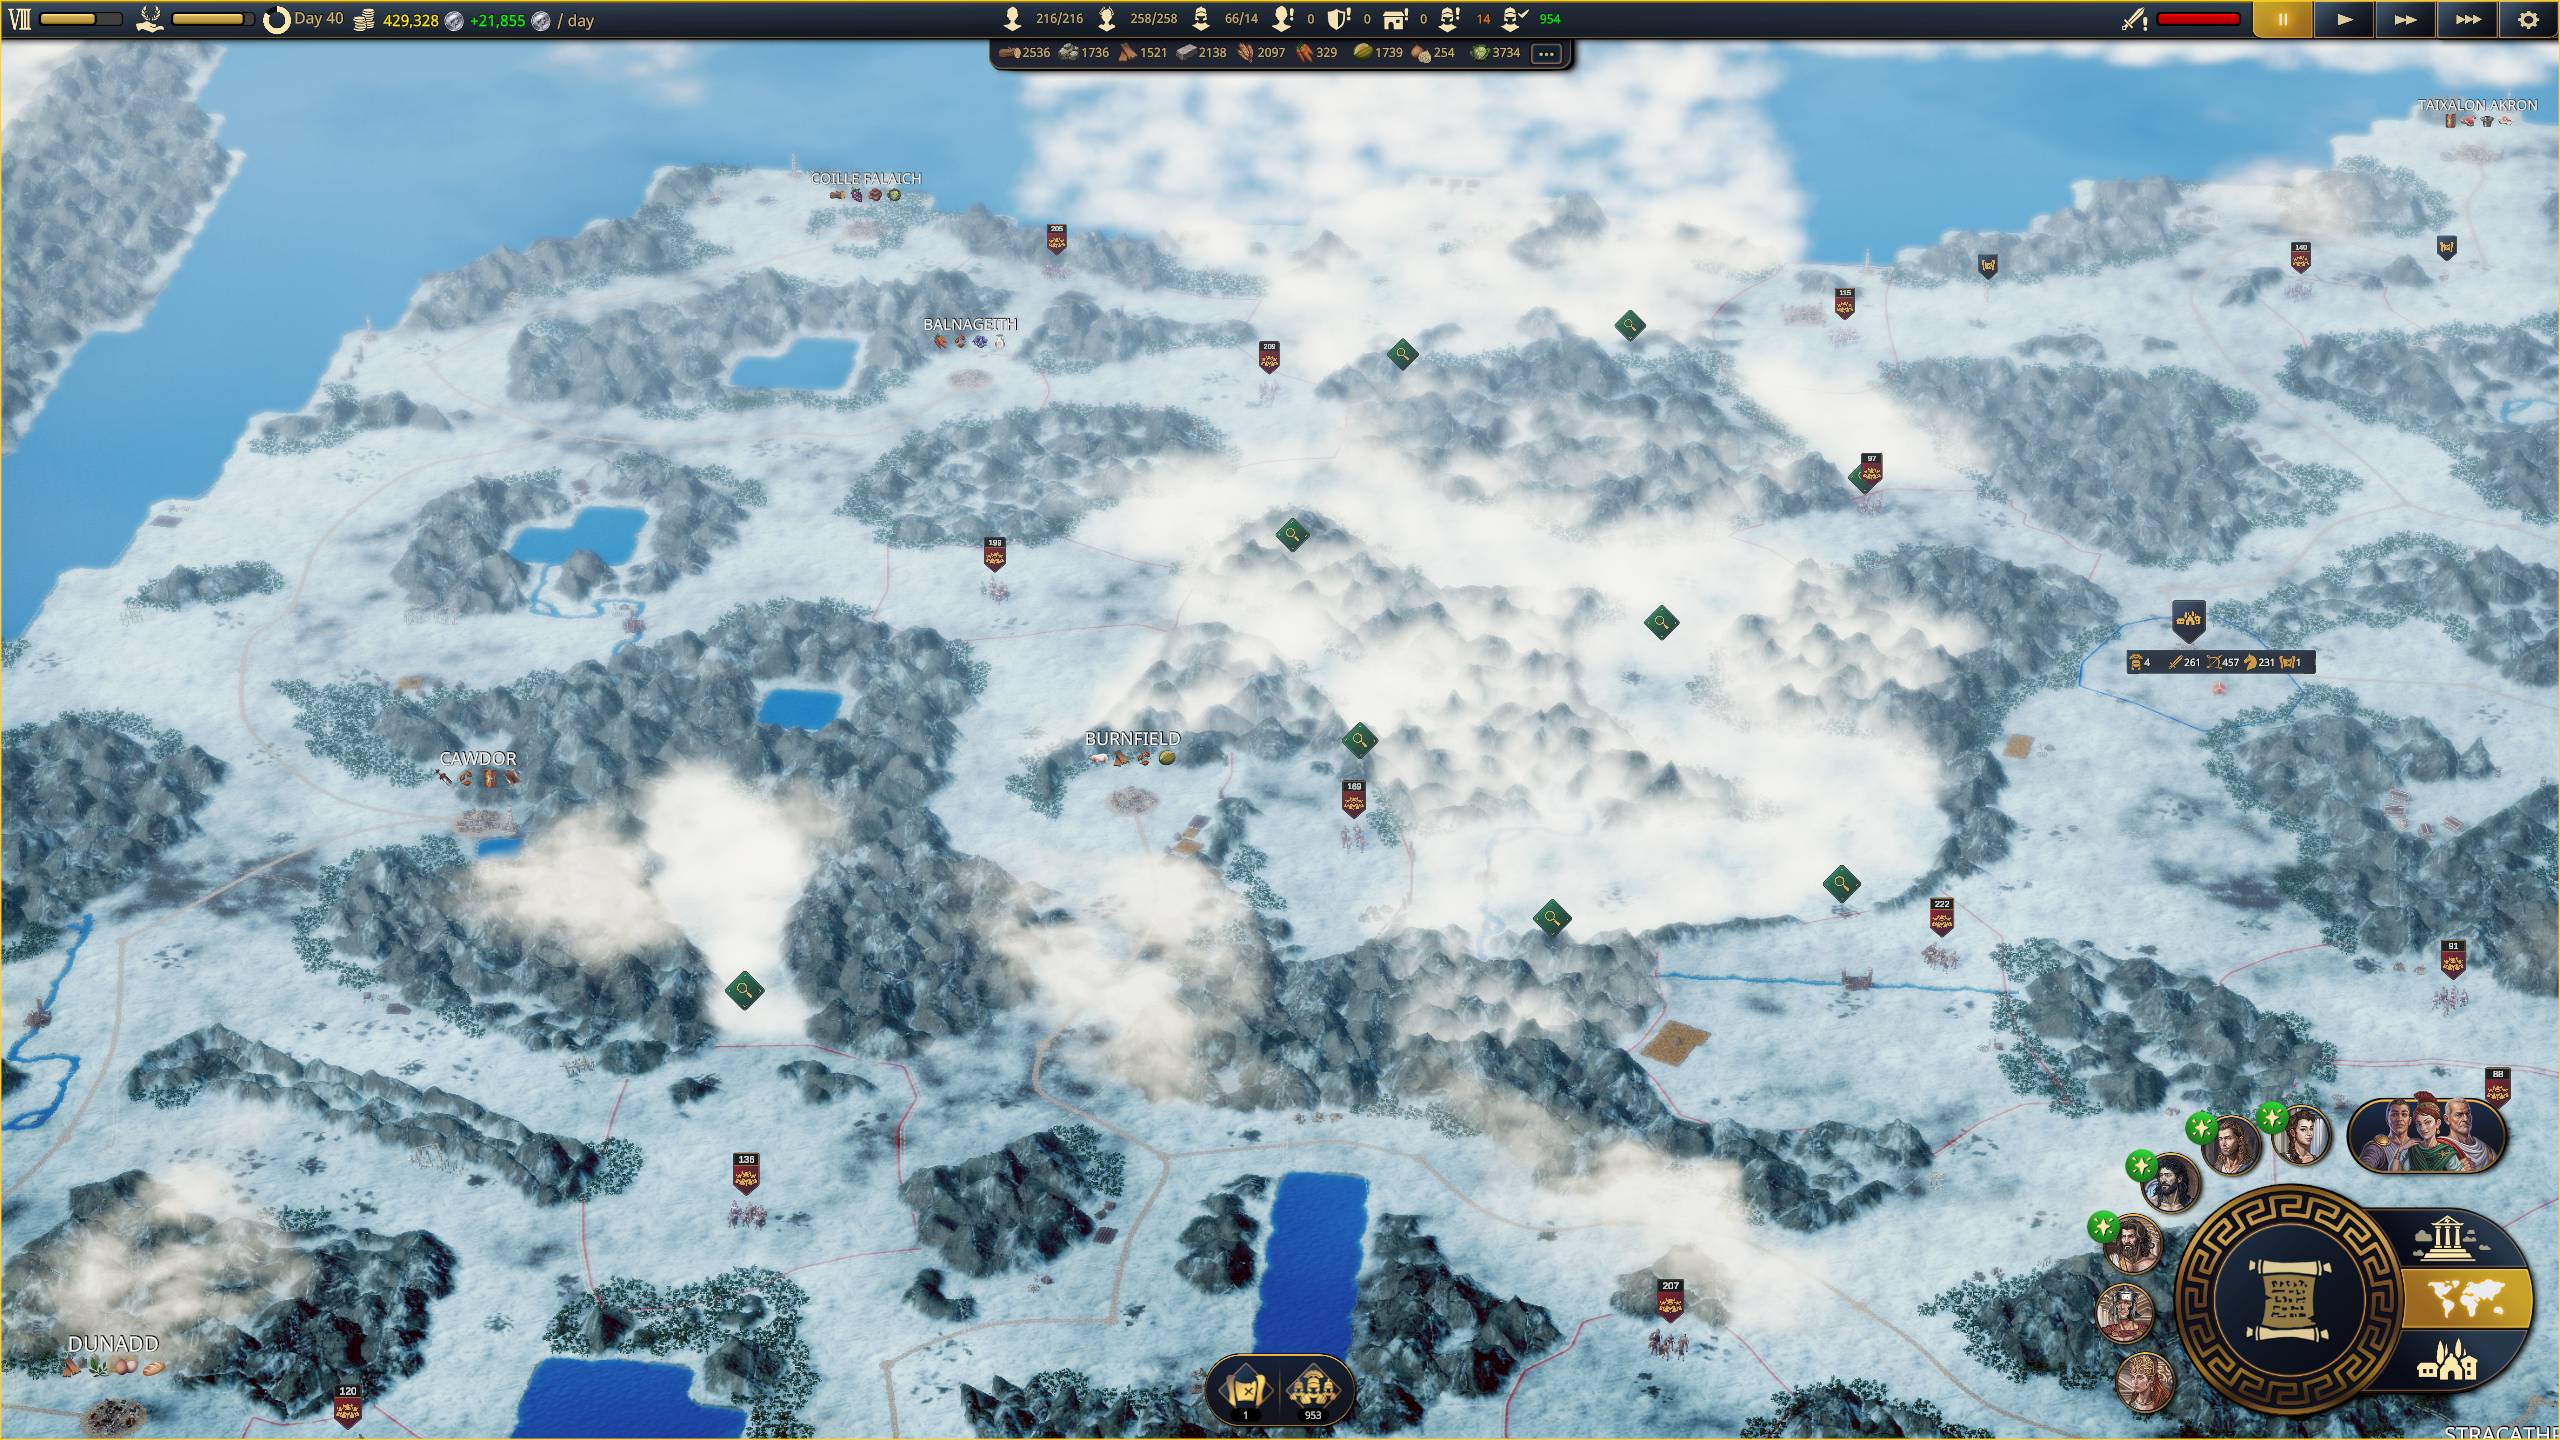
The north-west part of the map. In the bottom right corner, Dunadd and Cawdor, with Taixalon Akron in the upper left corner.
Taixalon Akron is protected by a massive enemy archer army. Of course, you can beat them, but you will need to almost micromanage your soldiers once you're on the battlefield. If you leave it to chance, you will most definitely loose.
Stuck on this final battle? There will be a guide on how to defeat archer heavy enemies soon!
Once you've defeated this wicked enemy, you will have freed your last city: Taixalon Akron! ✅
Ave Caesar!
Continuing after victory
This map is HUGE. This guide has led you to all of your objectives. Maybe not using the quickest route, but at least the route offering the least resistance.
This also means there are at least a dozen armies left to fight. There will be tens of regions to explore, cities to find and artifacts to uncover.
The map is so large, generating a screenshot of the whole map in one go is impossible. No matter how you tilt or turn your view, there is no way you can get the whole map on a single screen. It's insane.
So yes, explore the map with your scouts and crush any opposition you may find with your legions. Free the whole of Britannia and unite the whole world under your rule!
